As a seasoned supplier of ADSS fittings, I understand the paramount importance of correct installation for ensuring the long - term performance and safety of ADSS (All - Dielectric Self - Supporting) cable systems. In this blog, I'll share comprehensive insights on how to install ADSS fittings correctly.
Pre - installation Preparations
Before starting the installation process, it's crucial to conduct a series of preparatory steps.


- Site Inspection: Thoroughly examine the installation site. Check the terrain, the height and spacing of poles or towers, and any potential obstacles such as trees, buildings, or power lines. Ensure that the route is clear and there are no environmental factors that could damage the ADSS cable or fittings. For example, if there are areas prone to flooding or strong winds, proper measures should be considered in advance.
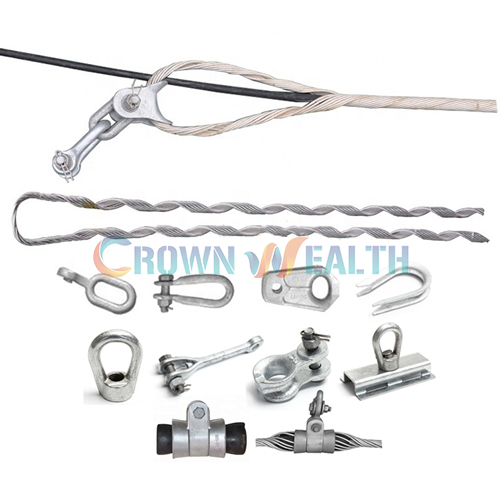
- Material Check: Carefully inspect all the ADSS fittings, including Fastening Fixture, ADSS Cable Guy Grips Sets, and Performed Helical Suspension Clamp. Verify the quantity, model, and appearance of each fitting. Look for any signs of damage, such as cracks, dents, or corrosion. Make sure that all the fittings meet the design requirements and relevant standards.
- Tool Preparation: Gather all the necessary tools for installation, such as wrenches, pliers, hoisting equipment, and measuring tools. Ensure that the tools are in good working condition and have the appropriate specifications for the job.
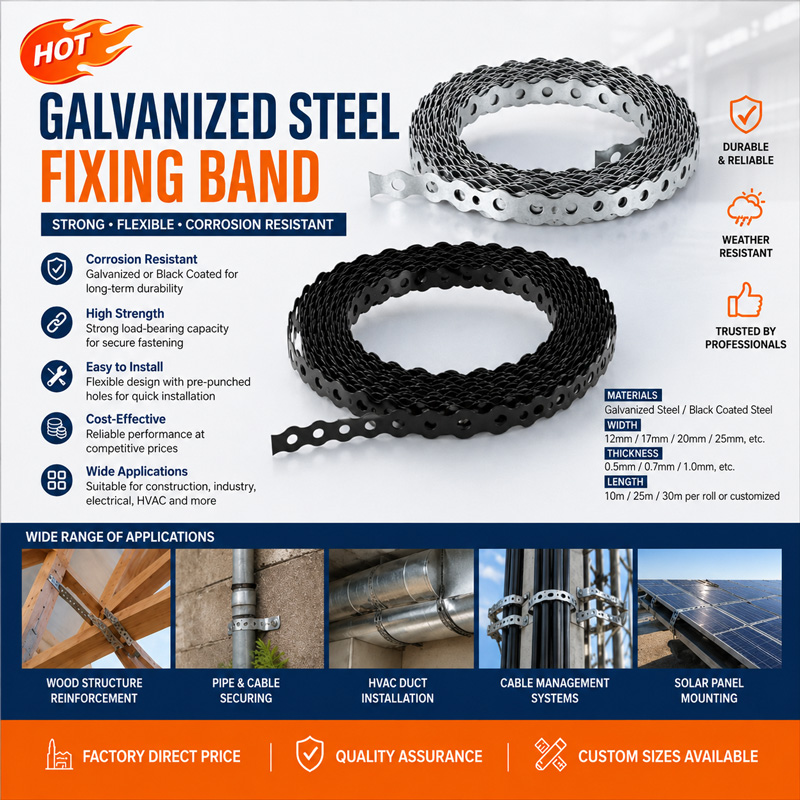
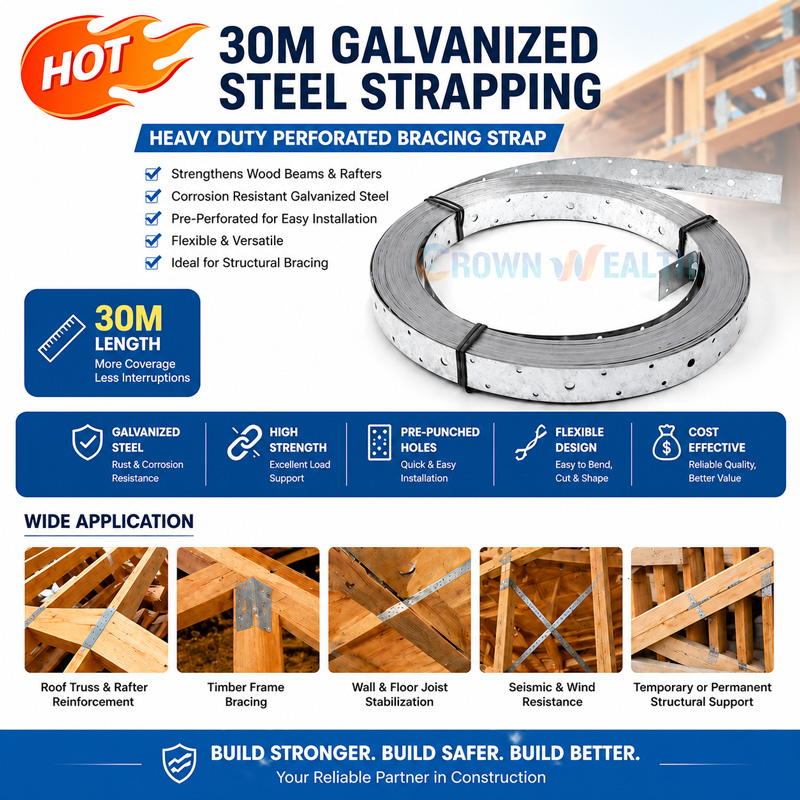
Installation of Fastening Fixtures
Fastening fixtures play a vital role in securing the ADSS cable to the poles or towers.
- Positioning: Determine the correct position for installing the fastening fixtures on the poles or towers according to the design requirements. Usually, the fixtures should be installed at a suitable height to support the cable properly and avoid contact with other objects. Measure the distance carefully to ensure accurate positioning.
- Mounting: Use the appropriate bolts and nuts to fix the fastening fixtures firmly to the poles or towers. Tighten the bolts according to the specified torque value to ensure a secure connection. Make sure that the fixtures are level and perpendicular to the cable route to prevent uneven stress on the cable.
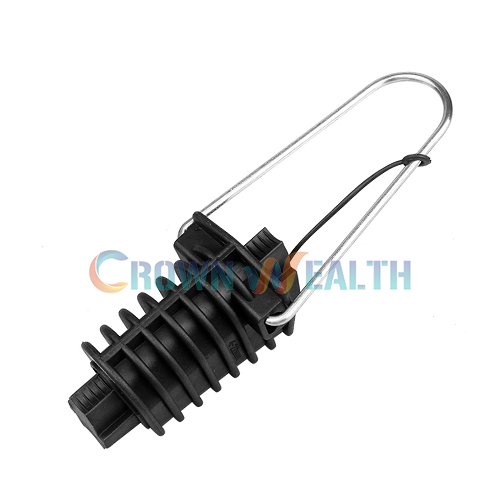
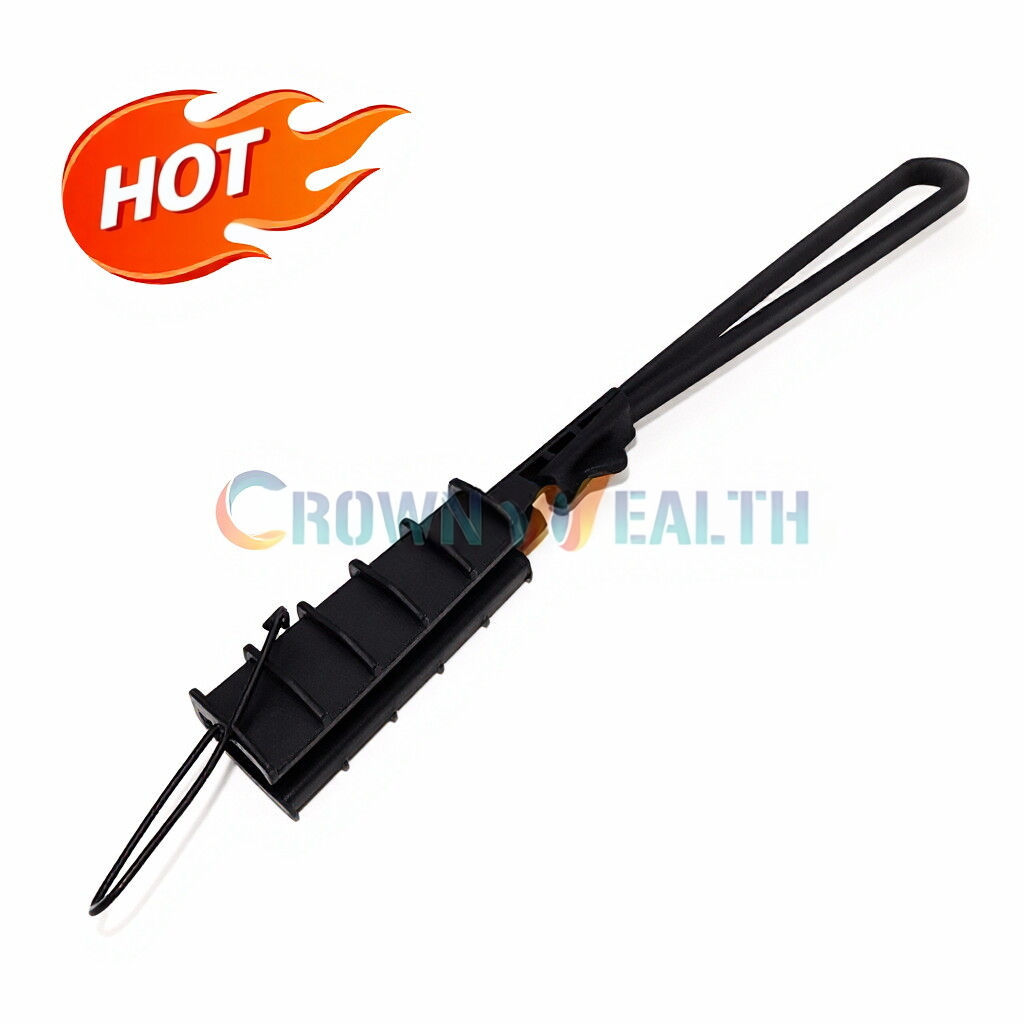
Installation of ADSS Cable Guy Grips Sets
ADSS cable guy grips sets are used to provide additional support and tension control for the ADSS cable.
- Cable Preparation: Before installing the guy grips sets, clean the surface of the ADSS cable to remove any dirt, grease, or debris. This will ensure good contact between the guy grips and the cable.
- Installation Process: Open the guy grips sets and place them around the cable at the designated positions. Follow the manufacturer's instructions to adjust the tightness of the guy grips. The tightness should be sufficient to grip the cable firmly without causing damage to the cable. Usually, a certain amount of pre - tension is applied when installing the guy grips to ensure proper tensioning of the cable.
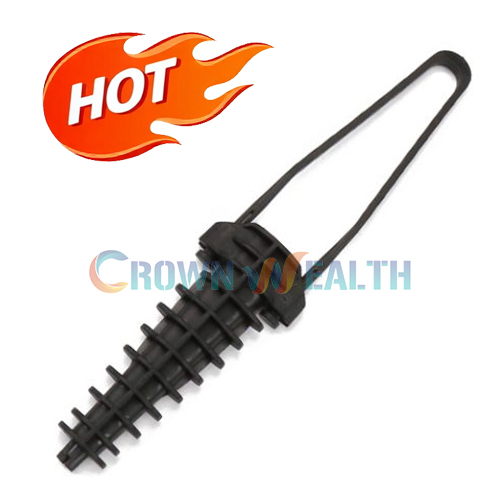
Installation of Performed Helical Suspension Clamps
Performed helical suspension clamps are designed to support the ADSS cable at suspension points.
- Assembly: First, assemble the helical suspension clamps according to the instructions. Make sure all the components are correctly joined together.
- Cable Installation: Gently place the ADSS cable into the helical part of the suspension clamp. Rotate the clamp slightly to ensure that the cable is evenly seated in the helical groove. Then, use the appropriate tools to tighten the clamp to the specified torque. This will ensure that the cable is securely suspended and can withstand the expected loads.
Post - installation Checks
After the installation of all ADSS fittings is completed, a series of checks should be carried out to ensure the quality of the installation.
- Visual Inspection: Inspect all the fittings and the cable visually. Check for any signs of misalignment, loose connections, or damage. Make sure that all the bolts and nuts are tightened properly.
- Tension Check: Use a tension meter to measure the tension of the ADSS cable. The tension should be within the specified range to ensure the normal operation of the cable and the fittings. If the tension is too high or too low, adjustments should be made accordingly.
- Function Test: Conduct a function test of the entire ADSS cable system. Check for any signal transmission problems or other malfunctions. If any issues are found, troubleshoot and resolve them in a timely manner.
Importance of Correct Installation
Correct installation of ADSS fittings is essential for several reasons. Firstly, it ensures the safety of the cable system. Properly installed fittings can prevent the cable from sagging, swinging, or being damaged by external forces, reducing the risk of accidents. Secondly, it guarantees the long - term performance of the cable. Incorrect installation may cause uneven stress on the cable, leading to premature aging or failure. Finally, correct installation can save maintenance costs in the long run. A well - installed ADSS cable system requires less frequent maintenance and repair.
Conclusion
Installing ADSS fittings correctly is a complex but crucial task. By following the pre - installation preparations, proper installation procedures, and post - installation checks, you can ensure the successful installation of the ADSS cable system. As an experienced ADSS fitting supplier, we offer high - quality products and professional technical support. If you are planning an ADSS cable project or need to purchase ADSS fittings, we are here to provide you with the best solutions. Contact us for more information and let's start a fruitful cooperation.
References
- Industry standards for ADSS cable installation
- Manufacturer's installation manuals for ADSS fittings