Hey there! As a supplier of OPGW Strain Clamps, I've seen firsthand how crucial it is to ensure proper alignment during installation. Misaligned clamps can lead to a whole bunch of problems, like reduced cable lifespan, signal interference, and even safety hazards. So, in this blog post, I'm gonna share some tips on how to make sure your OPGW Strain Clamps are installed with perfect alignment.
Pre - installation Checks
Before you even start the installation process, there are a few things you need to do. First off, you gotta inspect the OPGW cable. Look for any signs of damage, like cuts, kinks, or abrasions. A damaged cable can affect the performance of the clamp and make alignment a real pain. Also, check the length of the cable to ensure it's long enough for the installation.
Next, take a good look at the OPGW Strain Clamp itself. Make sure all the parts are present and in good condition. Check for any manufacturing defects, such as cracks or uneven surfaces. If you notice anything wrong, don't use the clamp. Instead, contact us, and we'll get you a replacement.
You should also gather all the necessary tools for the installation. This includes things like wrenches, pliers, and a measuring tape. Having the right tools on hand will make the installation process go much smoother and help you achieve better alignment.
Site Preparation
The installation site plays a big role in the alignment of the OPGW Strain Clamp. First, clean the area where the clamp will be installed. Remove any dirt, debris, or rust. A clean surface ensures a better grip between the clamp and the cable, which is essential for proper alignment.


Measure and mark the exact location where the clamp will be placed on the cable. Use a measuring tape to get accurate measurements. Make sure the markings are clear and visible. This will help you position the clamp correctly during installation.
If the installation is taking place on a pole or a tower, check the stability of the structure. A wobbly or unstable pole can cause the clamp to become misaligned over time. If necessary, reinforce the pole or tower before proceeding with the installation.
Installation Process
Now, let's get into the actual installation of the OPGW Strain Clamp. Start by carefully placing the clamp around the OPGW cable at the marked location. Make sure the clamp is centered on the cable. You can use a level to check if the clamp is horizontal or vertical, depending on the installation requirements.
Tighten the bolts or fasteners on the clamp gradually. Don't tighten them all at once. Instead, go around the clamp and tighten each bolt a little bit at a time. This helps to distribute the pressure evenly and ensures that the clamp is properly aligned.
As you're tightening the bolts, keep an eye on the alignment of the clamp. If you notice that the clamp is starting to shift or become misaligned, stop and readjust it before tightening the bolts further.
Using Alignment Aids
There are some alignment aids that can make the installation process even easier. For example, some OPGW Strain Clamps come with built - in alignment guides. These guides help you position the clamp correctly on the cable.
You can also use external alignment tools, such as alignment jigs. These jigs are designed to hold the clamp in place while you tighten the bolts, ensuring perfect alignment. If you're not sure which alignment aids to use, give us a shout, and we'll be happy to recommend the right ones for your specific installation.
Quality Control
Once the OPGW Strain Clamp is installed, it's important to perform a quality control check. First, visually inspect the clamp to make sure it's properly aligned. Look for any signs of misalignment, such as gaps between the clamp and the cable or uneven tightening of the bolts.
Use a torque wrench to check the tightness of the bolts. Make sure the bolts are tightened to the manufacturer's recommended torque specifications. Over - tightening or under - tightening the bolts can lead to misalignment and other problems.
You can also perform a stress test on the cable and the clamp. Apply a small amount of tension to the cable and check if the clamp remains in place and properly aligned. If you notice any issues during the stress test, make the necessary adjustments.
Post - installation Maintenance
Proper maintenance after the installation is crucial to keep the OPGW Strain Clamp aligned. Regularly inspect the clamp and the cable for any signs of wear and tear. Check for loose bolts, corrosion, or damage to the clamp.
If you find any loose bolts, tighten them immediately. If there's corrosion, clean the affected area and apply a corrosion - resistant coating. If the clamp is damaged, replace it as soon as possible to prevent further alignment issues.
Related Products
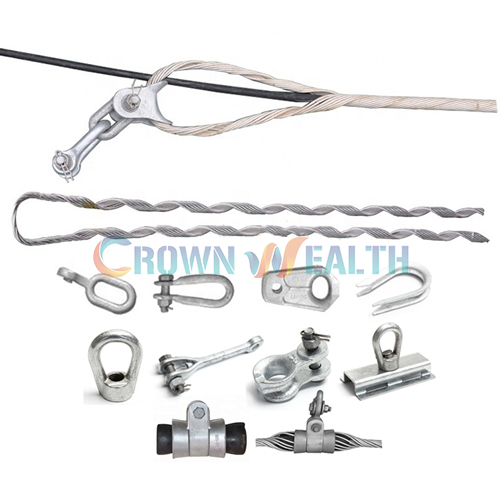
We also offer a range of related products that can enhance the performance of your OPGW system. For example, our OPGW Preformed Helical Tension Clamp provides excellent tension resistance and is easy to install. Our Double Suspension Clamp for OPGW is great for suspending the OPGW cable in a stable manner. And if you need to store your OPGW cable, our OPGW Cable Storage solutions are top - notch.
Contact Us for Purchase
If you're looking to purchase OPGW Strain Clamps or any of our other products, we're here to help. We have a wide range of high - quality clamps and accessories to meet your needs. Whether you're working on a small - scale project or a large - scale infrastructure development, we can provide you with the right products and support.
Don't hesitate to reach out to us if you have any questions about the installation process, alignment, or product selection. Our team of experts is always ready to assist you. We're committed to providing you with the best products and service in the industry.
References
- "Fiber Optic Cable Installation Handbook"
- "Guide to OPGW Fittings and Installation"
- Industry standards and guidelines for OPGW installation