Installing a protective fitting on a curved surface can be a challenging yet crucial task, especially when it comes to ensuring the safety and longevity of various structures and equipment. As a supplier of protective fittings, I've encountered numerous scenarios where proper installation on curved surfaces is essential. In this blog, I'll share some insights and step - by - step guidelines on how to install a protective fitting on a curved surface.
Understanding the Curved Surface
Before starting the installation process, it's vital to have a clear understanding of the curved surface. The degree of curvature, the material of the surface, and its overall condition all play significant roles. For instance, the installation on a gently curved metal pipe will be different from that on a highly curved composite structure.
Measure the radius of curvature accurately. This can be done using specialized measuring tools such as a curvature gauge. Knowing the radius helps in selecting the appropriate protective fitting. Some fittings are designed for specific curvature ranges, and using the wrong fitting can lead to improper installation and reduced effectiveness.
Selecting the Right Protective Fitting
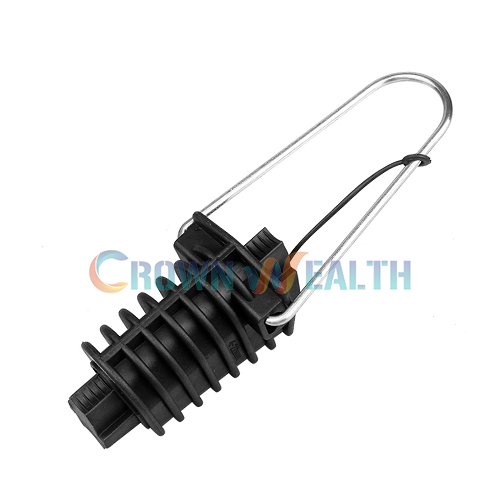
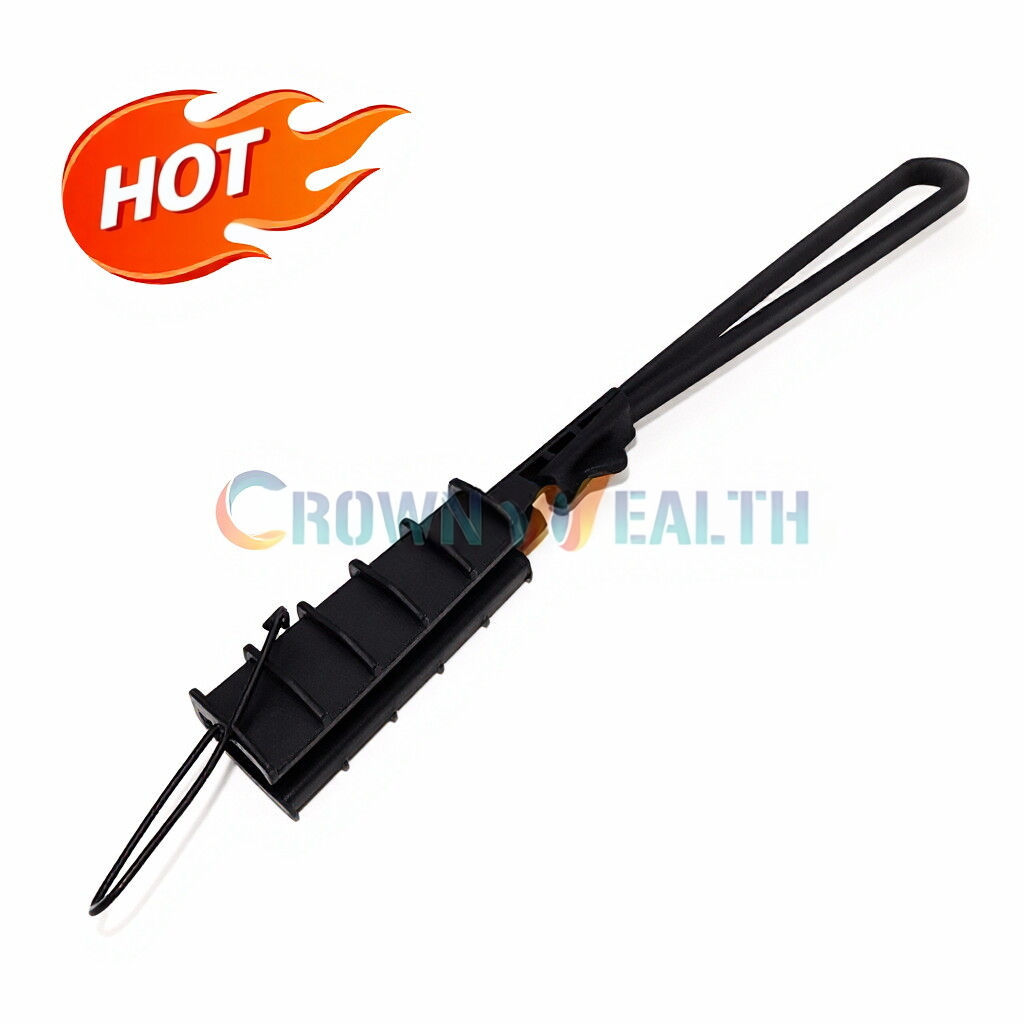
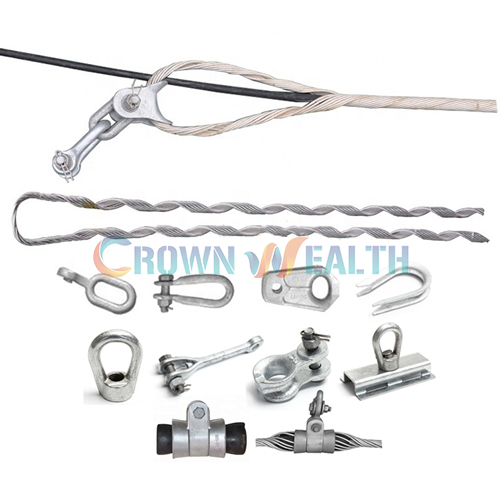
As a protective fitting supplier, I offer a wide range of products suitable for different curved surfaces. For example, Dead End Guy Grips are commonly used in overhead line applications. These grips are designed to provide a secure connection on curved cables and wires, preventing them from coming loose under tension.
Another popular product is the Overhead Line Accessories Preformed Dead End Clamp Guy Grip for Cable. This type of fitting is pre - formed to match the curvature of the cable, ensuring a snug fit and reliable performance.
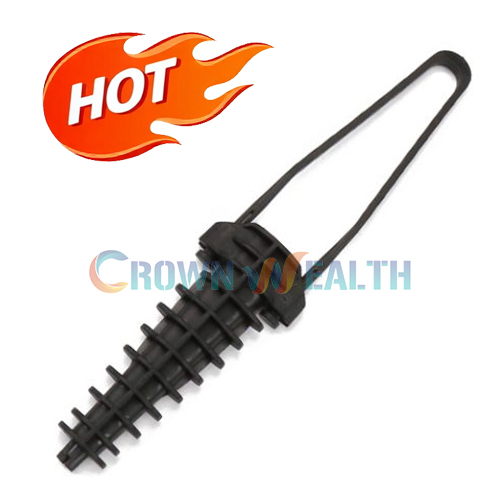
Preformed Armor Rods are also excellent choices for protecting curved surfaces, especially in power transmission and distribution systems. They help to distribute stress evenly along the curved conductor, reducing the risk of damage due to bending and vibration.
Preparing the Surface
Proper surface preparation is key to a successful installation. First, clean the curved surface thoroughly to remove any dirt, grease, rust, or other contaminants. This can be done using a suitable cleaning agent and a brush or cloth. For metal surfaces, it may be necessary to use a rust remover and then apply a primer to prevent future corrosion.
Inspect the surface for any defects such as cracks, dents, or unevenness. If there are minor defects, they can be repaired using appropriate fillers or patching materials. For more severe defects, it may be necessary to replace the damaged section of the surface before installing the protective fitting.
Installation Process
Step 1: Positioning the Fitting
Carefully place the protective fitting on the curved surface at the desired location. Make sure it is aligned correctly and centered on the area that needs protection. Some fittings may have markings or guides to help with positioning. For example, pre - formed fittings are designed to match the curvature of the surface precisely, so they should fit snugly without any gaps.


Step 2: Securing the Fitting
Once the fitting is properly positioned, it's time to secure it in place. The method of securing depends on the type of fitting and the surface material. For mechanical fittings, such as clamps and grips, use the appropriate tools to tighten the bolts or screws. Make sure not to overtighten, as this can damage the fitting or the surface.
For adhesive - based fittings, apply the adhesive evenly to the back of the fitting and the surface. Follow the manufacturer's instructions regarding the curing time and temperature. During the curing process, keep the fitting in place and avoid any movement or stress on the joint.
Step 3: Checking the Installation
After securing the fitting, check the installation for any signs of misalignment, looseness, or improper bonding. Make sure the fitting is firmly attached and provides the desired level of protection. If necessary, make any adjustments or re - tighten the fasteners.
Quality Assurance
To ensure the long - term performance of the protective fitting on the curved surface, it's important to conduct quality assurance checks. This can include visual inspections, non - destructive testing (such as ultrasonic testing for metal fittings), and performance testing under simulated operating conditions.
Regular maintenance is also crucial. Inspect the fitting periodically for any signs of wear, damage, or corrosion. Replace any worn or damaged parts promptly to prevent failures.
Conclusion
Installing a protective fitting on a curved surface requires careful planning, proper selection of fittings, and precise installation techniques. As a protective fitting supplier, I am committed to providing high - quality products and technical support to ensure successful installations.
If you are in need of protective fittings for curved surfaces or have any questions about the installation process, I encourage you to contact me for further discussion. Whether you are working on a small - scale project or a large - scale industrial application, I can help you find the right solutions for your specific needs. Let's work together to protect your valuable assets and ensure the safety and reliability of your systems.
References
- Manufacturer's manuals for Dead End Guy Grips, Overhead Line Accessories Preformed Dead End Clamp Guy Grip for Cable, and Preformed Armor Rods.
- Industry standards and guidelines for protective fitting installation on curved surfaces.